Lab Investment Pays Off For Major Tube & Profile House
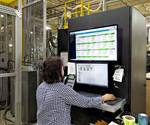
Teel started a testing laboratory in 2010 to support quality assurance and new product development and to troubleshoot manufacturing issues as they arise.
For six decades now, . has specialized in high-tech custom tubing and profile extrusion. An ISO 9001-certified processor that focuses on lean manufacturing practices, Teel has four manufacturing facilities in the Baraboo, Wis., area.
Commitment to quality is a key element in Teel’s strategy to distinguish itself and its products from the competition. Quality is a commitment that starts at the top. “Teel believes that by bringing science into the products and processes within the company, we’ll continuously be able to improve the quality of the products we produce,” says Jay Smith, owner and CEO.
While almost everyone in manufacturing touts their ability to produce quality parts, Teel has put its money where its mouth is, starting a testing laboratory in 2010 to support quality assurance and new product development and to troubleshoot manufacturing issues as they arise. “The laboratory produces valuable information for the company, but the value of that information is tied to the accuracy and repeatability of the test methods,” adds Joel Lischefski, laboratory supervisor. This entails having tests performed “by qualified personnel on quality instruments,” he says.
To that end, lab personnel that oversee the testing at Teel are all degreed scientists. The lab uses testing and measuring instrumentation of various types from the likes of Waters Corp., Mettler Toledo, Arizona Instruments, and Testing Solutions Inc., among others.
Test methods are taken from authoritative sources (such as ASTM) when available, and are validated. “The validation process, though time-consuming, is often ignored but is critical to defining how well the test method performs,” states Lischefski. “For instance, a test method used for process control would be inadequate if the variation in the test method is as wide as the expected variation in the process. Without validating the method ahead of time, and as an ongoing process, the method variation is an unknown, and the manufacturer can spend endless amounts of time and money trying to determine why it has so much process variation when it is the test that is producing varied results.”
When testing samples in a laboratory, it is inevitable that at some point a test result will be reported that flies against all expectations and seems to make no sense, Lischefski points out. “At that point someone is bound to ask, ‘How do you know the data is right?’ It’s the process that goes on behind the scenes in a laboratory that ensures that data is produced accurately and reliably.
“A good laboratory method will routinely check the calibration of the equipment to ensure that the instrument results are accurate. It will test and confirm a reference sample to ensure that all sample preparation steps are within established limits; test and confirm a duplicate sample to prove that the results can be repeated within established limits; and, if applicable, check a blank sample to test for equipment contamination,” says Lischefski.
In an example illustrating the importance of ongoing method validation, one of the products produced by Teel is monitored for a compounded additive critical to the product’s performance. During routine testing, lab personnel noticed that there was more variation in the results than there had been in the past. All of the results passed the established limits of acceptance, but the variation was higher.
Because the lab continuously monitors the test-method variation, it was able to rule that out as a cause of the change and alerted the manufacturing staff that there was an abnormality in the manufacturing process. After investigating, it was found that a mixer in a tank had been intermittently turning on and off due to a fault in the controls. The problem was identified, isolated, and fixed within a couple of days.
“The validation showed that there were no changes in the test method and that the numbers being produced were attributable to changes in the samples being received—something that would not have been possible without proper, ongoing method validation,” says Lischefski.
Related Content
Where and How to Vent Injection Molds: Part 3
Questioning several “rules of thumb” about venting injection molds.
Read MoreBack to Basics on Mold Venting (Part 1)
Here’s what you need to know to improve the quality of your parts and to protect your molds.
Read MoreWhat to Know About Your Materials When Choosing a Feeder
Feeder performance is crucial to operating extrusion and compounding lines. And consistent, reliable feeding depends in large part on selecting a feeder compatible with the materials and additives you intend to process. Follow these tips to analyze your feeder requirements.
Read MorePolyethylene Fundamentals – Part 4: Failed HDPE Case Study
Injection molders of small fuel tanks learned the hard way that a very small difference in density — 0.6% — could make a large difference in PE stress-crack resistance.
Read MoreRead Next
Beyond Prototypes: 8 Ways the Plastics Industry Is Using 3D Printing
Plastics processors are finding applications for 3D printing around the plant and across the supply chain. Here are 8 examples to look for at NPE2024.
Read MorePeople 4.0 – How to Get Buy-In from Your Staff for Industry 4.0 Systems
Implementing a production monitoring system as the foundation of a ‘smart factory’ is about integrating people with new technology as much as it is about integrating machines and computers. Here are tips from a company that has gone through the process.
Read MoreLead the Conversation, Change the Conversation
Coverage of single-use plastics can be both misleading and demoralizing. Here are 10 tips for changing the perception of the plastics industry at your company and in your community.
Read More
